SV——接口

1. Interface概念

System Verilog中引入了接口定义,接口与module 等价的定义,是要在其他的接口、module中直接定义,不能写在块语句中,跟class是不同的。

​ 接口是将一组线捆绑起来,可以将接口传递给module。

2. 接口的优点

一)通过接口在module之间或内部进行信号,模块的输入列表就是一个接口,这样简单,避免手动连线的错误。

二)如果需要增加模块的IO,只需要在接口中增加,不需要改变模块的输入列表,防止输入错误、少改了哪个模块的列表。

三)在UVM 中需要在不同的class之间传递信号,用接口的话,传递一组信号只需要uvm_config_db一个接口就可以了,如果不用接口,那么就需要好多条uvm_config_db语句。

四)接口中可以定义一些initial(生成时钟),always块,任务,函数,类的句柄。

3. 定义接口

可以在接口中定义一些信号、函数、任务、class对象,也可以有always,initial语句块。

比如可以在initial块中生成时钟clk。

3.1 定义

1
2
3
4
5
interface if(input bit clk);
logic data;
logic valid;
logic addr;
endinterface

3.2 modport

可以用modport将接口中的信号分组。

比如总线接口中,master、slave、arbiter需要的信号是不同的,输入输出也不同。

1
2
3
4
5
6
7
8
9
10
11
12
13
14
15
16
17
18
19
interface if(input bit clk);
logic [7:0] data;
logic valid;
logic [7:0] addr;
logic request;
logic grant;
logic command;
logic ready;
modport MASTER(output request,addr,command);
modport SLAVE(input request,addr,command,output ready);
modport ARBITER(input request,output grant);
endinterface
module Master (if.MASTER if_u);
...
endmodule
module test;
if if_u;
Master m_u(if_u.MASTER);
endmodule

4. 激励时序

测试平台需要和设计之间的时序密切配合。

​ 比如在同一个时间片内,一个信号需要被同时写入和读取,那么采样到新值还是旧值?非阻塞赋值可以解决这个问题,值的计算在active区域,值的更新在NBA区域——采样到的是旧值。

4.1 时钟块控制同步信号的时序

在接口中定义时钟块,时钟块中的任何信号都相对于时钟同步驱动和采样。时钟块大都在测试平台中使用。

1
2
3
4
5
6
7
8
9
10
11
12
interface if(input bit clk);
logic [7:0] data;
logic valid;
logic [7:0] addr;
clocking cb@(posedge clk);
input valid;
input data;
input addr;
endclocking
modport TEST(clocking cb);
modport DUT(input valid ,input data);
endinterface

​ 一个接口中可以有多个时钟块,但每个时钟块只有一个时钟表达式。如@(posedge clk)定义了单时钟;@(clk)定义了DDR时钟(双数据率,两个沿)。

4.2 logic还是wire

​ 在测试平台中,如果用过程赋值语句驱动接口中的信号,那么信号要在接口中定义为logic,如果是连续赋值驱动,定义成wire。

定义成logic的一个好处是,如果多个信号驱动logic,那么编译器会报错,这样你就知道写错了,如果是wire,这个错误就隐藏了。

4.3 对测试平台和DUT中事件的调度

​ 如果没有用时钟块,测试平台对DUT的驱动和采样存在竞争,这是因为测试平台的事件和DUT的事件混合在同一个时间片中。

​ SV中将测试平台中的事件和DUT中的事件分离。

时间片划分:

SV的主要调度区域:

4.4 设计和测试平台之间的时序

时钟块(测试平台)在#1step延时之后采样DUT,也就是采样上一个时间片postponed区域的数据。也就是前面讲的采样旧值。

时钟块(测试平台)在#0延时之后驱动DUT信号。0延迟说明还在同一个time slot,DUT能够捕捉到变化。

更细致的时间片划分:

time slot
active design
inactive 显示0延迟阻塞赋值;
observed SVA
reactive SV
postponed SV 采样

5. 接口采样和驱动信号的时序。

为了同步接口中的信号,可以在时钟沿采样或者驱动接口信号。

可以在接口中定义时钟块来同步接口信号:

1
2
3
4
5
6
7
8
9
10
11
12
interface if(input bit clk);
logic data;
logic valid;
logic addr;
clocking cb@(posedge clk);
input valid;
input data;
input addr;
endclocking
modport TEST(clocking cb);
modport DUT(input valid ,input data);
endinterface

在测试平台中的信号才需要同步

5.1 接口信号采样时序

如果时钟块中的信号采样DUT中的信号,采样的是上一个时间片(time slot)postponed区域的数据。

即如果DUT信号在时钟沿发生0-1跳变,那么采样到0。

DUT接口想要驱动TEST接口中时钟块里的信号,需要线给DUT接口信号赋值:

1
2
3
4
5
6
module dut(if.DUT if0);
....
#10 if0.valid = 1;
#10 if0.valid = 2;
....
endmodule

5.2 接口信号驱动时序

如果时钟块驱动DUT信号,值会立即传入到设计中。

即如果时钟块中的信号在时钟沿发生0-1跳变,则时钟沿之后DUT中为1。

时钟块想要驱动DUT,需要在testbench给时钟块中的信号赋值,在tb中驱动时钟块中的信号需要同步驱动,用“<=”符号。时钟块中的信号驱动采样

1
2
3
4
5
6
program tb(if.TEST if1);
...
#10 if1.cb.valid <= 1;
#10 if1.cb.valid <= 0;
...
endprogram

6. 使用虚接口

之前介绍的接口都是跟module一样来描述硬件的;在SV中有面向对象的概念,在class里面使用虚接口——virtual interface。

虚接口是一个物理接口的句柄(handler),同这个句柄来访问硬件接口。

虚接口是唯一链接动态对象和静态模块、接口的一种机制。

6.1 在测试平台中使用接口

1
2
3
4
5
6
7
8
9
10
11
12
13
14
15
16
17
18
19
20
interface inf; //定义接口
...
endinterface
program test(inf if0); // 接口传入测试平台
driver drv;
initial begin
drv = new(if0); // 接口传给driver对象
end
endprogram
class driver;
virtual vif; // 在class中为虚接口
function new(inf i);
vif=i;
endfunction
endclass
module top;
inf inf0(); // 例化接口
test t1(inf0);
dut d1(inf0);
endmodule

也可以在tb中跨模块引用XMR(cross module reference)接口

1
2
3
4
5
6
7
8
9
program test(); //没有接口参数
virtual inf if0=top.inf0;//top是顶层模块
...
endprogram
module top;
inf inf0(); // 例化接口
test t1(); // tb无接口列表
dut d1(inf0);
endmodule

6.2 使用端口传递接口数组

1
2
3
4
5
6
7
8
9
10
11
12
13
14
15
interface inf(input clk);
...
endinterface
parameter NUM=10;
module top;
inf xi[NUM](clk); // 顶层例化多个接口,接口名后跟个数
test t1(xi);// 接口作为参数
dut...
endmodule
program test(inf xi[NUM]); // 接口参数列表
virtual inf vxi[NUM];
initial begin
vxi=xi;
end
endprogram

也可以用跨模块引用。

7. 接口中的代码

接口中可以定义信号、函数、任务、class对象,也可以有always,initial语句块。

下面给一个在《UVMPrimer》中的例子:

1
2
3
4
5
6
7
8
9
10
11
12
13
14
15
16
17
18
19
20
21
22
23
24
25
26
27
28
29
30
31
32
33
34
35
36
37
38
39
40
41
42
43
44
45
46
47
48
49
50
51
52
53
54
55
56
57
58
59
60
61
62
63
64
65
66
67
68
69
70
71
72
73
74
75
76
77
78
79
80
81
82
83
84
85
86
87
88
89
90
91
92
93
94
95
96
97
98
99
100
101
102
103
104
105
interface tinyalu_bfm;
import tinyalu_pkg::*;

byte unsigned A;
byte unsigned B;
bit clk;
bit reset_n;
wire [2:0] op;
bit start;
wire done;
wire [15:0] result;
operation_t op_set;

assign op = op_set;

task reset_alu();
reset_n = 1'b0;
@(negedge clk);
@(negedge clk);
reset_n = 1'b1;
start = 1'b0;
endtask : reset_alu

task send_op(input byte iA, input byte iB, input operation_t iop, shortint result);
if (iop == rst_op) begin
@(posedge clk);
reset_n = 1'b0;
start = 1'b0;
@(posedge clk);
#1;
reset_n = 1'b1;
end else begin
@(negedge clk);
op_set = iop;
A = iA;
B = iB;
start = 1'b1;
if (iop == no_op) begin
@(posedge clk);
#1;
start = 1'b0;
end else begin
do
@(negedge clk);
while (done == 0);
start = 1'b0;
end
end // else: !if(iop == rst_op)

endtask : send_op

command_monitor command_monitor_h;

function operation_t op2enum();
case(op)
3'b000 : return no_op;
3'b001 : return add_op;
3'b010 : return and_op;
3'b011 : return xor_op;
3'b100 : return mul_op;
default : $fatal("Illegal operation on op bus");
endcase // case (op)
endfunction : op2enum


always @(posedge clk) begin : op_monitor
static bit in_command = 0;
command_s command;
if (start) begin : start_high
if (!in_command) begin : new_command
command.A = A;
command.B = B;
command.op = op2enum();
command_monitor_h.write_to_monitor(command);
in_command = (command.op != no_op);
end : new_command
end : start_high
else // start low
in_command = 0;
end : op_monitor

always @(negedge reset_n) begin : rst_monitor
command_s command;
command.op = rst_op;
command_monitor_h.write_to_monitor(command);
end : rst_monitor

result_monitor result_monitor_h;

initial begin : result_monitor_thread
forever begin
@(posedge clk) ;
if (done)
result_monitor_h.write_to_monitor(result);
end
end : result_monitor_thread

initial begin
clk = 0;
forever begin
#10;
clk = ~clk;
end
end
endinterface : tinyalu_bfm
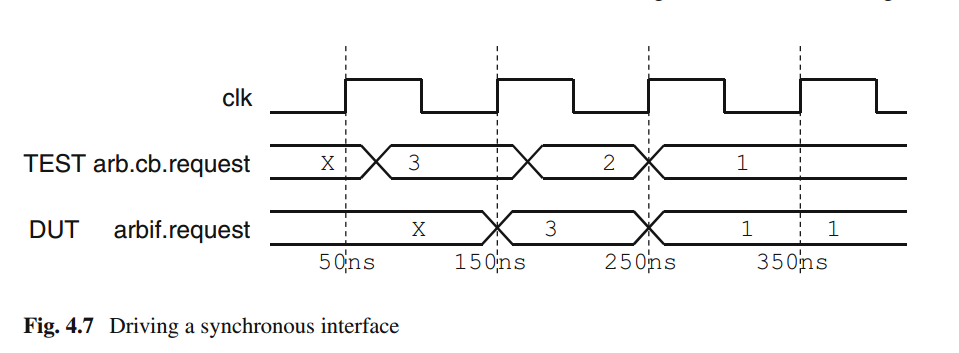
函数使用的时候通过接口对象调用就行了

1
2
3
4
virtual tinyalu_bfm inf;
initial begin
inf.send_op(..);
end

8. 接口使用注意事项

  • 接口不能在package中被`include 。

    下面这种写法是会报错的。

    1
    2
    3
    4
    package pkg;
    `include "apb_if.sv"
    ……
    endpackage

    而要放在package外面

    1
    2
    3
    4
    `include "apb_if.sv"
    package pkg;
    ……
    endpackage
  • 如果要在UVM中要通过hierarchy访问DUT中的信号,最好将这些信号放在interface中,然后将virtual interface传给UVM

    1
    2
    3
    4
    5
    6
    7
    8
    9
    10
    11
    12
    13
    14
    // 在接口中定义信号
    interface bfm;
    bit[7:0 addr;
    endinterface

    // 实例化接口
    bfm u_bfm();

    // 将虚接口传给UVM
    initial begin
    uvm_config_db#(vitual bfm)::set("", uvm_test_top, "bfm", bfm);
    end

    // 在UVM可直接操作虚接口

    如果不这样的话,当uvm component(driver, monitor, agent等)文件是通过package来管理的话,就不能在UVM中hierarchy引用DUT中的信号。


本博客所有文章除特别声明外,均采用 CC BY-SA 4.0 协议 ,转载请注明出处!